Search Member Photography
Search thousands of images by name, description, or tags. Results may include images from photography websites hosted by ShutterForge.com.
Your search for 'camel' in all photos returned 100 results.
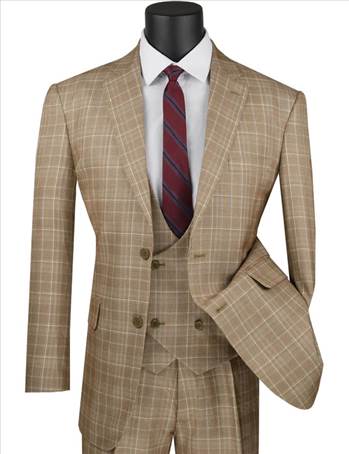
01-Buy now- Men's Camel Tan Plaid 3 Piece Suit Low Cut Vest V2RW-7.jpg
From the
My Photos collection.
By
SuitSecret
thumbnail-1.jpeg
From the
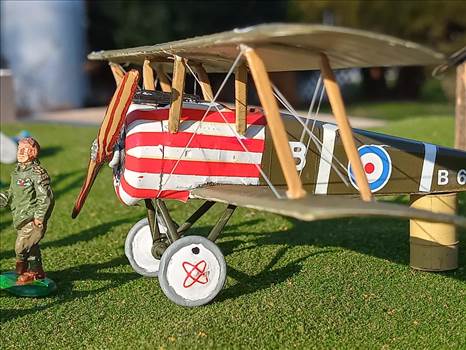
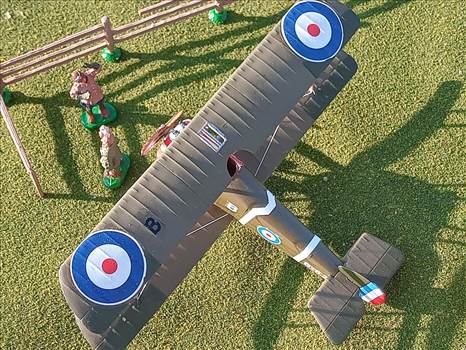
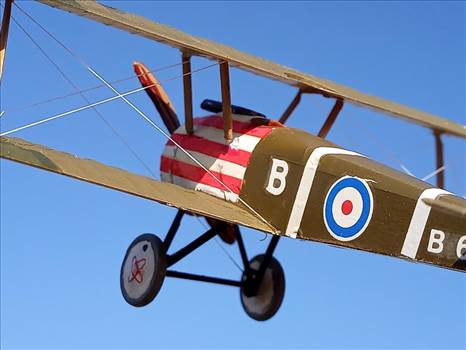
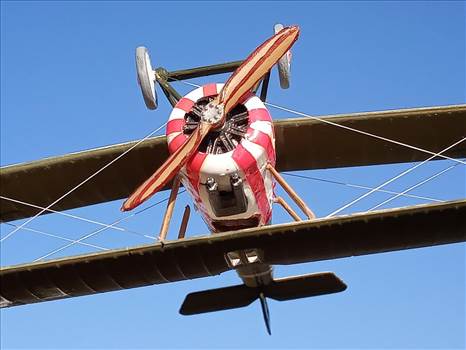
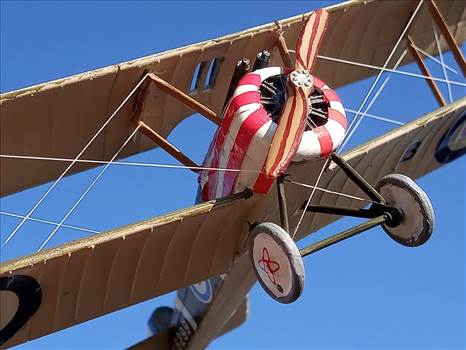
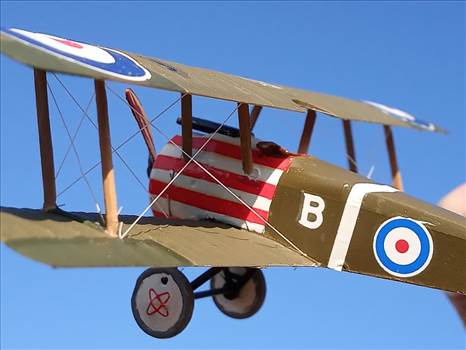
WW1 Aircraft - 1/72- Part 17 - Sopwith2! collection.
By
ScottUehl
1/72 Biplane, RFC 1/72, World War One, WW1, Royal Flying Corps, Revell, Revell 1/72, Model aircraft, Sopwith Camel, RNAS 10 Squadron, Flt Lt Norman McGregor, RNAS, RNAS 6 Naval Squadron, B6299.
world war one, ww1, royal flying corps, revell, model aircraft, sopwith camel, rnas 10 squadron, flt lt norman mcgregor, rnas, rnas 6 naval squadron, b6299
thumbnail-2.jpeg
From the
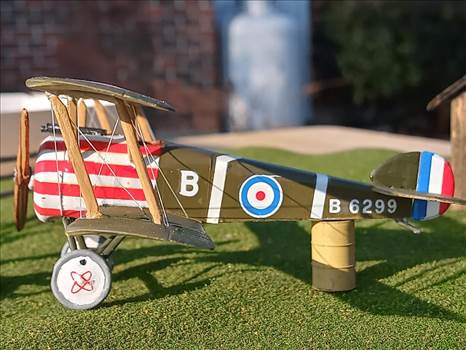
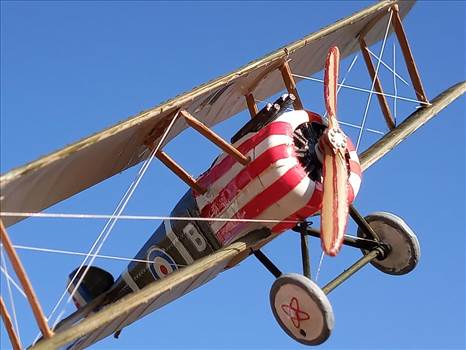
WW1 Aircraft - 1/72- Part 17 - Sopwith2! collection.
By
ScottUehl
1/72 Biplane, RFC 1/72, World War One, WW1, Royal Flying Corps, Revell, Revell 1/72, Model aircraft, Sopwith Camel, RNAS 10 Squadron, Flt Lt Norman McGregor, RNAS, RNAS 6 Naval Squadron, B6299.
world war one, ww1, royal flying corps, revell, model aircraft, sopwith camel, rnas 10 squadron, flt lt norman mcgregor, rnas, rnas 6 naval squadron, b6299
thumbnail-3.jpeg
From the
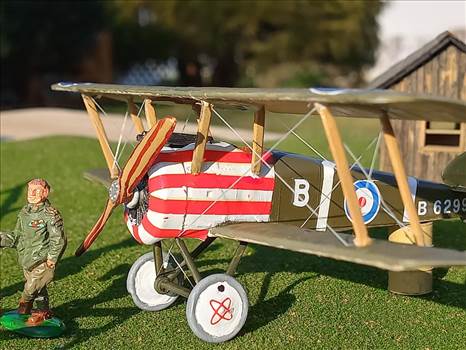
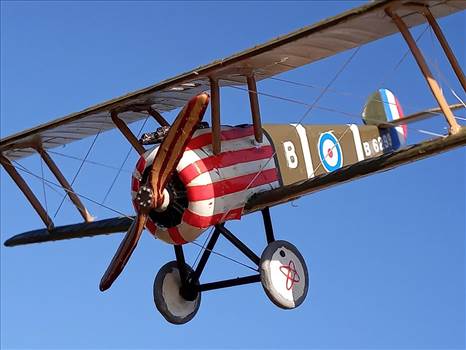
WW1 Aircraft - 1/72- Part 17 - Sopwith2! collection.
By
ScottUehl
1/72 Biplane, RFC 1/72, World War One, WW1, Royal Flying Corps, Revell, Revell 1/72, Model aircraft, Sopwith Camel, RNAS 10 Squadron, Flt Lt Norman McGregor, RNAS, RNAS 6 Naval Squadron, B6299.
world war one, ww1, royal flying corps, revell, model aircraft, sopwith camel, rnas 10 squadron, flt lt norman mcgregor, rnas, rnas 6 naval squadron, b6299
thumbnail-4.jpeg
From the
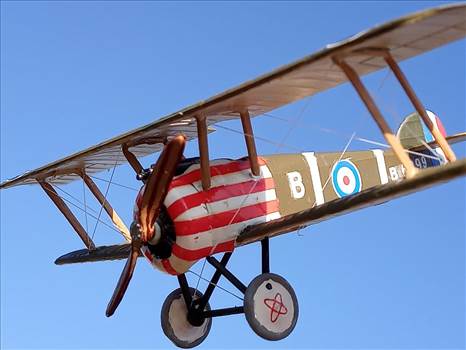
WW1 Aircraft - 1/72- Part 17 - Sopwith2! collection.
By
ScottUehl
1/72 Biplane, RFC 1/72, World War One, WW1, Royal Flying Corps, Revell, Revell 1/72, Model aircraft, Sopwith Camel, RNAS 10 Squadron, Flt Lt Norman McGregor, RNAS, RNAS 6 Naval Squadron, B6299.
world war one, ww1, royal flying corps, revell, model aircraft, sopwith camel, rnas 10 squadron, flt lt norman mcgregor, rnas, rnas 6 naval squadron, b6299
thumbnail-5.jpeg
From the
WW1 Aircraft - 1/72- Part 17 - Sopwith2! collection.
By
ScottUehl
1/72 Biplane, RFC 1/72, World War One, WW1, Royal Flying Corps, Revell, Revell 1/72, Model aircraft, Sopwith Camel, RNAS 10 Squadron, Flt Lt Norman McGregor, RNAS, RNAS 6 Naval Squadron, B6299.
world war one, ww1, royal flying corps, revell, model aircraft, sopwith camel, rnas 10 squadron, flt lt norman mcgregor, rnas, rnas 6 naval squadron, b6299
thumbnail-6.jpeg
From the
WW1 Aircraft - 1/72- Part 17 - Sopwith2! collection.
By
ScottUehl
1/72 Biplane, RFC 1/72, World War One, WW1, Royal Flying Corps, Revell, Revell 1/72, Model aircraft, Sopwith Camel, RNAS 10 Squadron, Flt Lt Norman McGregor, RNAS, RNAS 6 Naval Squadron, B6299.
world war one, ww1, royal flying corps, revell, model aircraft, sopwith camel, rnas 10 squadron, flt lt norman mcgregor, rnas, rnas 6 naval squadron, b6299
thumbnail-7.jpeg
From the
WW1 Aircraft - 1/72- Part 17 - Sopwith2! collection.
By
ScottUehl
1/72 Biplane, RFC 1/72, World War One, WW1, Royal Flying Corps, Revell, Revell 1/72, Model aircraft, Sopwith Camel, RNAS 10 Squadron, Flt Lt Norman McGregor, RNAS, RNAS 6 Naval Squadron, B6299.
world war one, ww1, royal flying corps, revell, model aircraft, sopwith camel, rnas 10 squadron, flt lt norman mcgregor, rnas, rnas 6 naval squadron, b6299
thumbnail-8.jpeg
From the
WW1 Aircraft - 1/72- Part 17 - Sopwith2! collection.
By
ScottUehl
1/72 Biplane, RFC 1/72, World War One, WW1, Royal Flying Corps, Revell, Revell 1/72, Model aircraft, Sopwith Camel, RNAS 10 Squadron, Flt Lt Norman McGregor, RNAS, RNAS 6 Naval Squadron, B6299.
world war one, ww1, royal flying corps, revell, model aircraft, sopwith camel, rnas 10 squadron, flt lt norman mcgregor, rnas, rnas 6 naval squadron, b6299
thumbnail-9.jpeg
From the
WW1 Aircraft - 1/72- Part 17 - Sopwith2! collection.
By
ScottUehl
1/72 Biplane, RFC 1/72, World War One, WW1, Royal Flying Corps, Revell, Revell 1/72, Model aircraft, Sopwith Camel, RNAS 10 Squadron, Flt Lt Norman McGregor, RNAS, RNAS 6 Naval Squadron, B6299.
world war one, ww1, royal flying corps, revell, model aircraft, sopwith camel, rnas 10 squadron, flt lt norman mcgregor, rnas, rnas 6 naval squadron, b6299
thumbnail-12.jpeg
From the
WW1 Aircraft - 1/72- Part 17 - Sopwith2! collection.
By
ScottUehl
1/72 Biplane, RFC 1/72, World War One, WW1, Royal Flying Corps, Revell, Revell 1/72, Model aircraft, Sopwith Camel, RNAS 10 Squadron, Flt Lt Norman McGregor, RNAS, RNAS 6 Naval Squadron, B6299.
world war one, ww1, royal flying corps, revell, model aircraft, sopwith camel, rnas 10 squadron, flt lt norman mcgregor, rnas, rnas 6 naval squadron, b6299
thumbnail-13.jpeg
From the
WW1 Aircraft - 1/72- Part 17 - Sopwith2! collection.
By
ScottUehl
1/72 Biplane, RFC 1/72, World War One, WW1, Royal Flying Corps, Revell, Revell 1/72, Model aircraft, Sopwith Camel, RNAS 10 Squadron, Flt Lt Norman McGregor, RNAS, RNAS 6 Naval Squadron, B6299.
world war one, ww1, royal flying corps, revell, model aircraft, sopwith camel, rnas 10 squadron, flt lt norman mcgregor, rnas, rnas 6 naval squadron, b6299
thumbnail-14.jpeg
From the
WW1 Aircraft - 1/72- Part 17 - Sopwith2! collection.
By
ScottUehl
1/72 Biplane, RFC 1/72, World War One, WW1, Royal Flying Corps, Revell, Revell 1/72, Model aircraft, Sopwith Camel, RNAS 10 Squadron, Flt Lt Norman McGregor, RNAS, RNAS 6 Naval Squadron, B6299.
world war one, ww1, royal flying corps, revell, model aircraft, sopwith camel, rnas 10 squadron, flt lt norman mcgregor, rnas, rnas 6 naval squadron, b6299
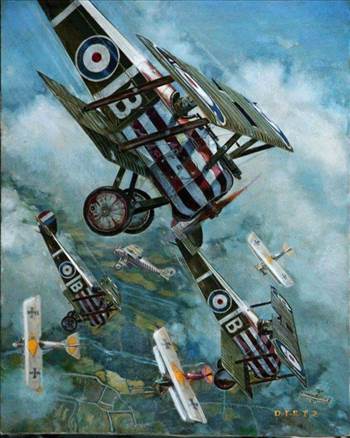
Revell Camel RNAS 10 Sqn.jpg
From the
WW1 Aircraft - 1/72- Part 17 - Sopwith2! collection.
By
ScottUehl
world war one, ww1, royal flying corps, revell, model aircraft, sopwith camel, rnas 10 squadron, flt lt norman mcgregor, rnas, rnas 6 naval squadron, b6299
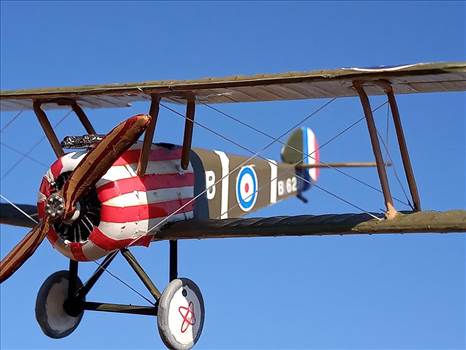
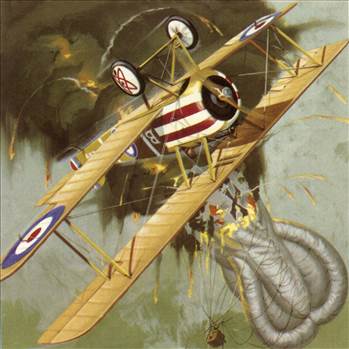
Striped Camel Strike!.jpg
From the
WW1 Aircraft - 1/72- Part 17 - Sopwith2! collection.
By
ScottUehl
world war one, ww1, royal flying corps, revell, model aircraft, sopwith camel, rnas 10 squadron, flt lt norman mcgregor, rnas, rnas 6 naval squadron, b6299